Many PCs and Macs will have python already installed.
To check if you have python installed on a Windows PC, search in the start bar for Python or run the following on the Command Line (cmd.exe):
C:\Users\Your Name>python --version
To check if you have python installed on a Linux or Mac, then on linux open the command line or on Mac open the Terminal and type:
python --version
If you find that you do not have python installed on your computer, then you can download it for free from the following website: https://www.python.org/
Python Quickstart
Python is an interpreted programming language, this means that as a developer you write Python (.py) files in a text editor and then put those files into the python interpreter to be executed.
The way to run a python file is like this on the command line:
C:\Users\Your Name>python helloworld.py
Where "helloworld.py" is the name of your python file.
Let's write our first Python file, called helloworld.py, which can be done in any text editor.
Python is a popular programming language. It was created by Guido van Rossum, and released in 1991.
It is used for:
web development (server-side),
software development,
mathematics,
system scripting.
What can Python do?
Python can be used on a server to create web applications.
Python can be used alongside software to create workflows.
Python can connect to database systems. It can also read and modify files.
Python can be used to handle big data and perform complex mathematics.
Python can be used for rapid prototyping, or for production-ready software development.
Why Python?
Python works on different platforms (Windows, Mac, Linux, Raspberry Pi, etc).
Python has a simple syntax similar to the English language.
Python has syntax that allows developers to write programs with fewer lines than some other programming languages.
Python runs on an interpreter system, meaning that code can be executed as soon as it is written. This means that prototyping can be very quick.
Python can be treated in a procedural way, an object-orientated way or a functional way.
Good to know
The most recent major version of Python is Python 3, which we shall be using in this tutorial. However, Python 2, although not being updated with anything other than security updates, is still quite popular.
In this tutorial Python will be written in a text editor. It is possible to write Python in an Integrated Development Environment, such as Thonny, Pycharm, Netbeans or Eclipse which are particularly useful when managing larger collections of Python files.
Python Syntax compared to other programming languages
Python was designed for readability, and has some similarities to the English language with influence from mathematics.
Python uses new lines to complete a command, as opposed to other programming languages which often use semicolons or parentheses.
Python relies on indentation, using whitespace, to define scope; such as the scope of loops, functions and classes. Other programming languages often use curly-brackets for this purpose.
Every line of code that runs in Java must be inside a class. In our example, we named the class MyClass. A class should always start with an uppercase first letter.
Note: Java is case-sensitive: "MyClass" and "myclass" has different meaning.
The name of the java file must match the class name. When saving the file, save it using the class name and add ".java" to the end of the filename. To run the example above on your computer, make sure that Java is properly installed: Go to the Get Started Chapter for how to install Java. The output should be:
Hello World
The main Method
The main() method is required and you will see it in every Java program:
publicstaticvoidmain(String[] args)
Any code inside the main() method will be executed. You don't have to understand the keywords before and after main. You will get to know them bit by bit while reading this tutorial.
For now, just remember that every Java program has a class name which must match the filename, and that every program must contain the main() method.
System.out.println()
Inside the main() method, we can use the println() method to print a line of text to the screen:
To check if you have Java installed on a Windows PC, search in the start bar for Java or type the following in Command Prompt (cmd.exe):
C:\Users\Your Name>java -version
If Java is installed, you will see something like this (depending on the version):
java version "11.0.1" 2018-10-16 LTS
Java(TM) SE Runtime Environment 18.9 (build 11.0.1+13-LTS)
Java HotSpot(TM) 64-Bit Server VM 18.9 (build 11.0.1+13-LTS, mixed mode)
If you do not have Java installed on your computer, you can download it for free from oracle.com.
Note: In this tutorial, we will write Java code in a text editor. However, it is possible to write Java in an Integrated Development Environment, such as IntelliJ IDEA, Netbeans or Eclipse, which are particularly useful when managing larger collections of Java files.
Setup for Windows
To install Java on Windows:
Go to "System Properties" (Can be found on Control Panel > System and Security > System > Advanced System Settings)
Click on the "Environment variables" button under the "Advanced" tab
Then, select the "Path" variable in System variables and click on the "Edit" button
Click on the "New" button and add the path where Java is installed, followed by \bin. By default, Java is installed in C:\Program Files\Java\jdk-11.0.1 (If nothing else was specified when you installed it). In that case, You will have to add a new path with: C:\Program Files\Java\jdk-11.0.1\bin Then, click "OK", and save the settings
At last, open Command Prompt (cmd.exe) and type java -version to see if Java is running on your machine
// Your First ProgramclassHelloWorld{publicstaticvoid main(String[] args){System.out.println("Hello, World!");}}
If you have copied the exact code, you need to save the file name as HelloWorld.java. It's because the name of the class and filename should match in
When you run the program, the output will be:
Hello, World!
How Java "Hello, World!" Program Works?
// Your First Program
In Java, any line starting with// is a comment. Comments are intended for users reading the code to better understand the intent and functionality of the program. It is completely ignored by the Java compiler (an application that translates Java program to Java bytecode that computer can execute). To learn more, visit Java comments.
class HelloWorld { ... }
In Java, every application begins with a class definition. In the program, HelloWorld is the name of the class, and the class definition is:
class HelloWorld {
... .. ...
}
For now, just remember that every Java application has a class definition, and the name of the class should match the filename in Java.
public static void main(String[] args) { ... }
This is the main method. Every application in Java must contain the main method. The Java compiler starts executing the code from the main method.
How does it work? Good question. However, we will not discuss it in this article. After all, it's a basic program to introduce Java programming language to a newbie. We will learn the meaning of public, static, void, and how methods work? in later chapters.
For now, just remember that the main function is the entry point of your Java application, and it's mandatory in a Java program. The signature of the main method in Java is:
public static void main(String[] args) {
... .. ...
}
System.out.println("Hello, World!");
The following code prints the string inside quotation marks Hello, World! to standard output (your screen). Notice, this statement is inside the main function, which is inside the class definition.
Things to take away
Every valid Java Application must have a class definition (that matches the filename).
The main method must be inside the class definition.
The compiler executes the codes starting from the main function.
This is a valid Java program that does nothing.
public class HelloWorld {
    public static void main(String[] args) {
        // Write your code here
    }
}
Don't worry if you don't understand the meaning of class, static, methods, and so on for now. We will discuss it in detail in later chapters.
Java is a simple language: Java is easy to learn and its syntax is clear and concise. It is based on C++ (so it is easier for programmers who know C++). Java has removed many confusing and rarely-used features e.g. explicit pointers, operator overloading etc. Java also takes care of memory management and it also provides an automatic garbage collector. This collects the unused objects automatically.
Java is a platform-independent language: The programs written in Java language, after compilation, are converted into an intermediate level language called the bytecode which is a part of the Java platform irrespective of the machine on which the programs run. This makes java highly portable as its bytecodes can be run on any machine by an interpreter called the Java Virtual Machine(JVM) and thus java provides ‘reusability of code’.
Java is an object-oriented programming language: OOP makes the complete program simpler by dividing it into a number of objects. The objects can be used as a bridge to have data flow from one function to another. We can easily modify data and function’s as per the requirements of the program.
Java is a robust language: Java programs must be reliable because they are used in both consumer and mission-critical applications, ranging from Blu-ray players to navigation systems.
Java is a multithreaded language: Java can perform many tasks at once by defining multiple threads. For example, a program that manages a Graphical User Interface (GUI) while waiting for input from a network connection uses another thread to perform and wait’s instead of using the default GUI thread for both tasks. This keeps the GUI responsive.
Java programs can create applets: Applets are programs that run in web browsers.
Java does not require any preprocessor: It does not require inclusion of header files for creating a Java application.
Therefore, Java is a very successful language and it is gaining popularity day by day.
Poppy Humanoid is an open-source and 3D printed humanoid robot. Optimized for research and education purposes, its modularity allows for a wide range of applications and experimentations.
Open Source
All the technological development work made in the Poppy project is freely available under open-source licenses. Only the name usage "Poppy" is restricted and protected as an international trademark, please contact us if you want to use it or have more information.
We are using a GitHub feature called GIT LFS. It is great for versioning Solidworks files but it stills lacks basic features. If you download directly Solidworks files from this web page, you will get an empty file...
You have two option:
Download the last official Solidworks version in the release. You will also find STL, STEP and Parasolid files.
Clone locally this repository following this guide. This solution is only for people desiring to contribute or develop news hardware features for Poppy.
Build your own Poppy Humanoid
Building a complete Poppy Humanoid costs $8000-9000 with about 60% for buying the 25 Robotis Dynamixel actuators required. The full BOM is available here >> Bill Of Material.
The STL files are available in the releases of this repository.
Then the process to assemble a complete Poppy Humanoid takes about 7h for handyman people. Yet the skills required are very limited and should not be a problem for anyone able to hold a screwdriver.
The assembly process is fully documented with video tutorials.
Poppy Humanoid is made to work with an Odroid U3 or an Odroid XU4. We provide our own system image (based on Ubuntu 14.04) that can be directly copied to the SD-card or MMC. You can refer to the documentation for more details. Note that if you buy it as a kit from one of the reseller you will also get a pre-installed SD-card.
Install the software tools locally
If you want to install the software tools locally and not use the embedded board to control the Robot or if you are working with the simulator, you will have to install Python. We strongly recommend using a pre-packaged distribution as Anaconda and install the poppy-humanoid package (the easiest way is via pip).
You can also use our setup script directly on an Odroid based on Ubuntu or Debian. Be aware though that it takes some time and some good knowledge of Linux This script is used to set up the Odroid to match our needs (custom Python, set up the web interface, a Poppy user...).
If you want to install the software locally and not use the embedded board to control the robot or if you are working with the simulator, you will have to install Python. We strongly recommend using a pre-packaged distribution as Anaconda and install the poppy-humanoid package (the easiest way is with pip install poppy-humanoid).
So there are many ways to contribute to this project and you are very welcome to do it.
Maybe the first step is to become a member of the community on the poppy forum. The forum is the very central place to exchange with users and contributors. You can freely come and talk about your project or ideas with your preferred language.
PHP is the most popular server-side programming language on the web. Installing PHP on your computer allows you to safely create and test a web application without affecting the data or systems on your live website. This article by Viswas, HSST Computer Science, Sree Narayana Higher Secondary School, Okkal, Ernakulam describes PHP installation as a module within the Windows. Click on the below link to start downloading the help file.
1. Headless auto start on boot. 2. Voice control of GPIOs without IFTTT, api.ai, Actions SDK. 3. Voice control of NodeMCU without IFTTT and MQTT. 4. Radio streaming. 5. Voice control of servo connected to RPi GPIO. 6. Safe shutdown RPi using voice command. 7. Stream Music from YouTube. 8. Indicator lights for assistant listening and speaking events. 9. Startup audio and audio feedback for wakeword detection. 10. Pushbutton service to stop Music or Radio playback. 11. Parcel tracking using Aftership API. 12. RSS Feed streaming. 13. Control of Kodi or Kodi Integration. 14. Streaming music from Google Play Music. 15. Casting of YouTube Videos to Chromecast and Chromecast media control by voice. 16. Voice control of Radio/YouTube/Google Music volume levels. 17. Control Sonoff Tasmota Devices/Emulated Wemo. 18. Track Kickstarter campaigns. 19. Emulated Philips Hue HUB service and control of Emulated Hue Lights. 20. Search recipes and get push message of ingredients and link to recipe. 21. Remote control of Magic Mirror. 22. Sending voice messages from the phone to the raspberry. 23. Play your Spotify playlist. 24. Custom wakeword activation for all Pi boards. 25. Mute microphones to prevent listening to Ok-Google hotword. 26. Create custom conversations. 27. Control of lights added to Domoticz. 28. Stream music from Gaana.com. 29. Stream your playlist from Deezer. 30. Custom actions in French, Italian, German, Dutch and Spanish.
Choose the audio configuration according to your setup. The speaker-test command is used to initialize alsa, so please do not skip that. AIY-HAT and CUSTOM-HAT users, please reboot the Pi at places mentioned, else it will lead to audio and taskbar issues.
3.1. USB DAC or USB Sound CARD users, sudo chmod +x ./GassistPi/audio-drivers/USB-DAC/scripts/install-usb-dac.sh sudo ./GassistPi/audio-drivers/USB-DAC/scripts/install-usb-dac.sh speaker-test 3.2. AIY-HAT users, sudo chmod +x ./GassistPi/audio-drivers/AIY-HAT/scripts/configure-driver.sh sudo ./GassistPi/audio-drivers/AIY-HAT/scripts/configure-driver.sh sudo reboot cd /home/${USER}/ sudo chmod +x ./GassistPi/audio-drivers/AIY-HAT/scripts/install-alsa-config.sh sudo ./GassistPi/audio-drivers/AIY-HAT/scripts/install-alsa-config.sh speaker-test 3.3. USB MIC AND HDMI users, sudo chmod +x ./GassistPi/audio-drivers/USB-MIC-HDMI/scripts/configure.sh sudo ./GassistPi/audio-drivers/USB-MIC-HDMI/scripts/configure.sh sudo reboot cd /home/${USER}/ sudo chmod +x ./GassistPi/audio-drivers/USB-MIC-HDMI/scripts/install-usb-mic-hdmi.sh sudo ./GassistPi/audio-drivers/USB-MIC-HDMI/scripts/install-usb-mic-hdmi.sh speaker-test 3.4. USB MIC AND AUDIO JACK users, sudo chmod +x ./GassistPi/audio-drivers/USB-MIC-JACK/scripts/usb-mic-onboard-jack.sh sudo ./GassistPi/audio-drivers/USB-MIC-JACK/scripts/usb-mic-onboard-jack.sh speaker-test 3.5. CUSTOM VOICE HAT users, sudo chmod +x ./GassistPi/audio-drivers/CUSTOM-VOICE-HAT/scripts/install-i2s.sh sudo ./GassistPi/audio-drivers/CUSTOM-VOICE-HAT/scripts/install-i2s.sh sudo reboot cd /home/${USER}/ sudo chmod +x ./GassistPi/audio-drivers/CUSTOM-VOICE-HAT/scripts/custom-voice-hat.sh sudo ./GassistPi/audio-drivers/CUSTOM-VOICE-HAT/scripts/custom-voice-hat.sh speaker-test 3.6. RESPEAKER HAT users, git clone https://github.com/shivasiddharth/seeed-voicecard cd ./seeed-voicecard/ sudo ./install.sh sudo reboot speaker-test Those using any other DACs or HATs install the cards as per the manufacturer's guide and then you can try using the USB-DAC config file after changing the hardware ids
Restart Pi
Check the speaker using the following command
speaker-test -t wav
CONTINUE After SETTING UP AUDIO
Follow the instructions here to Configure a Developer Project and Account Settings. Then follow this guide to register the device and obtain the credentials.json file. Refer to the video below for step by step guidelines.
Place the credentials.json file in/home/${USER}/ directory DO NOT RENAME
Use the one-line installer for installing Google Assistant Pi3 and Armv7 users use the "gassist-installer-pi3.sh" installer and Pi Zero, Pi A and Pi 1 B+ users use the "gassist-installer-pi-zero.sh" installer.
3.1 Change directory cd /home/${USER}/ 3.2 Make the installers Executable sudo chmod +x ./GassistPi/scripts/gassist-installer-pi3.sh sudo chmod +x ./GassistPi/scripts/gassist-installer-pi-zero.sh 3.3 Execute the installers Pi3 and Armv7 users use the "gassist-installer-pi3.sh" installer and Pi Zero, Pi A and Pi 1 B+ users use the "gassist-installer-pi-zero.sh" installer. When Prompted, enter your Google Cloud console Project-Id, A name for your Assistant and the Full Name of your credentials file, including the json extension. sudo ./GassistPi/scripts/gassist-installer-pi3.sh sudo ./GassistPi/scripts/gassist-installer-pi-zero.sh
Copy the google assistant authentication link from terminal and authorize using your google account
Copy the authorization code from browser onto the terminal and press enter
After successful authentication, the Google Assistant Demo test will automatically start. At the start, the volume might be low, the assistant volume is independent of the Pi volume, so increase the volume by using "Hey Google, Set volume to maximum" command.
After verifying the working of assistant, close and exit the terminal
HEADLESS AUTOSTART On BOOT SERVICE SETUP
Open the service files in the /GassistPi/systemd/ directory and add your project and model ids in the indicated places and save the file.
Enable the services - Pi3 and Armv7 users, enable the "gassistpi-ok-google.service" and Pi Zero, Pi A and Pi 1 B+ users, enable "gassistpi-push-button.service" Previously a service was dedicated for stopbutton that stops music/radio etc. Now, its being run in a thread along with the assistant so you will not find the service.
Start the service - Pi3 and Armv7 users, start the "gassistpi-ok-google.service" and Pi Zero, Pi A and Pi 1 B+ users, start "gassistpi-push-button.service" Previously a service was dedicated for stopbutton that stops music/radio etc. Now, its being run in a thread along with the assistant so you will not find the service.
At any point of time, if you wish to manually start the assistant: Ok-Google Hotword/Pi3/Pi2/Armv7 users Open a terminal and execute the following: /home/${USER}/env/bin/python -u /home/${USER}/GassistPi/src/main.py --device_model_id 'replace this with the model id' Pushbutton/Pi Zero/Pi B+ and other users Open a terminal and execute the following: /home/${USER}/env/bin/python -u /home/${USER}/GassistPi/src/pushbutton.py --project-id 'replace this with your project id' --device-model-id 'replace this with the model id' Insert your Project Id and Model Id in quotes in the mentioned places
USING THE CUSTOMIZATIONS
CUSTOM ACTIONS IN Non-English LANGUAGES
Languages supported: French, Italian, Spanish, Dutch and German. In the config.yaml file, under the Languages and Choice option set your desired language. Use the Translated versions of the English syntaxes given for all the custom actions.
MUSIC STREAMING FROM DEEZER
NOTE: As a roundabout approach, I have programmed the assistant to get the playlist details using Deezer API and then fetch those tracks from YouTube. This feature uses a YouTube Data API v3.
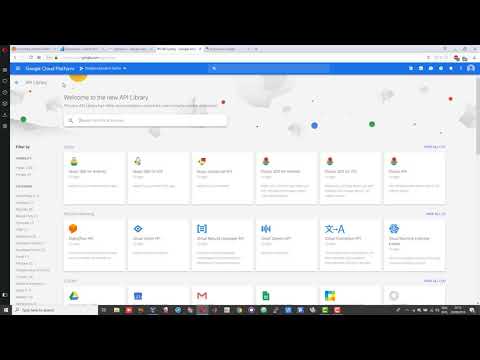
On the left top corner, click on the hamburger icon or three horizontal stacked lines.
Move your mouse pointer over "API and services" and choose "credentials".
Click on create credentials and select API Key and choose close. Make a note of the created API Key and enter it in the config.yaml script at the indicated location.
"From the API and services" option, select library and in the search bar type youtube, select "YouTube Data API v3" API and click on "ENABLE".
In the API window, click on "All API Credentials" and in the drop down, make sure to have a tick (check mark) against the API Key that you just generated.
Add your Deezer user number in the config.yaml under the "Deezer" and "User_id".
Note: The same API key can be used for Kickstarter, YouTube and Gaana feature. Syntax:
To play the playlists added to your Deezer account: Hey Google, Play playlist playlist-number from Deezer Example: Hey Google, Play playlist number 1 from Deezer
MUSIC STREAMING FROM GAANA.COM
NOTE: As a roundabout approach, I have programmed the assistant to get the playlist details using web requests and then fetch those tracks from YouTube. This feature uses a custom search engine as well as YouTube Data API v3.
Adding Google Custom Search Engine API, YouTube Data API And Generating API Key
On the left top corner, click on the hamburger icon or three horizontal stacked lines.
Move your mouse pointer over "API and services" and choose "credentials".
Click on create credentials and select API Key and choose close. Make a note of the created API Key and enter it in the config.yaml script at the indicated location.
"From the API and services" option, select library and in the search bar type search, select "Custom Search API" and click on "ENABLE".
"From the API and services" option, select library and in the search bar type youtube, select "YouTube Data API v3" API and click on "ENABLE".
In the API window, click on "All API Credentials" and in the drop down, make sure to have a tick (check mark) against the API Key that you just generated.
Note: The same API key can be used for Kickstarter and YouTube feature. Syntaxes: Note - It is necessary to Say the full "Gaana.com", otherwise the assistant will pick it up as Ghana (a country).
To play the playlists added in config.yaml file: Hey Google, Play playlist playlist-number from Gaana.com Example: Hey Google, Play playlist number 1 from Gaana.com
To play other playlists: Hey Google, Play user-playlist-query from Gaana.com
DOMOTICZ CONTROL
As of today, you can control lights and switches only, more controls will be added in the future.
If you want to control devices with Domoticz, in the config.yaml file under "Domoticz:" change "Domoticz_Control:" from "Disabled" to "Enabled".
List the device names and the ids that you want to control in the config.yaml file. The names should be the same as the ones in the domoticz server.
Syntaxes: To On/Off/Toggle (The light name should be the same as the Hardware name in Domoticz): Hey Google, Turn On/Turn Off/Toggle Name of your light . To Change Brightness (between 0 and 100): Hey Google, Set Name of your light brightness to desired value . To Change Colour (refer the list of available colors given below): Hey Google, Set Name of your light color to desired color . Hey Google, Change Name of your light to desired color .
CUSTOM CONVERSATIONS
Customize the assistant's reply to a specific question.
Add the list of questions and answers in config.yaml under the Conversation: option.
There must be only one question, but corresponding answers can be as many.
Sample questions and answers has been provided, please follow the same pattern.
CUSTOM WAKEWORD ACTIVATION
You can choose to either Enable or Disable the custom wakeword activation in the config.yaml file.
In the config.yaml file, under Wakewords, change the "Custom_Wakeword" to 'Enabled' if you want to use the custom wakeword or set it to 'Disabled' if you dont want to use the custom wakeword option.
For changes to take effect, you need to restart the assistant. Changing status while an instance of assistant is already running will not cause any change.
Create your custom snowboy model here. Add the models to /GassistPi/src/resources directory.
Change the paths to the models in the config.yaml file.
To disable the default "Ok Google" hotword, set the Ok_Google option to "Disabled".
Users using pushbutton.py or Pi Zero users have an option between using custom wakeword and GPIO trigerring. If custom wakeword is enabled, then GPIO trigger will not work. To enable GPIO triggering, set custom wakeword to 'Disabled'.
PLAYING SPOTIFY PLAYLIST
NOTE: Spotify API currently only supports playback in a web browser, but DRM content is being blocked in the Raspberry Pi. As a roundabout approach, I have programmed the assistant to get the playlist details using Spotipy API and then fetch those tracks from YouTube. This custom program has a better accuracy than spotify playlist playback using mpsyt.
Click here and register for a spotify developer account, if you already don't have one.
In the developer's dashboard, choose "CREATE A CLIENT ID". In the pop-up window provide the requested details.
Click on the new app created and copy the CLIENT ID and CLIENT SECRET. Paste it in the config.yaml file in the indicated space.
Access spotify:here and copy the username to be entered in config.yaml
Syntax: Hey Google, Play Your Spotify Playlist Name from Spotify
TRACKING KICKSTARTER CAMPAIGNS
A custom Google search engine for Kickstarter has been used. This requires an API to be added to your existing project.
Adding Google Custom Search Engine API And Generating API Key
On the left top corner, click on the hamburger icon or three horizontal stacked lines.
Move your mouse pointer over "API and services" and choose "credentials".
Click on create credentials and select API Key and choose close. Make a note of the created API Key and enter it in the config.yaml script at the indicated location.
"From the API and services" option, select library and in the search bar type search, select "Custom Search API" and click on "ENABLE".
In the API window, click on "All API Credentials" and in the drop down, make sure to have a tick (check mark) against the API Key that you just generated.
Note: The same API key can be used for YouTube and Gaana, but YouTube Data v3 API must be added to the project in the cloud console. Syntax: Hey Google, (What is the status of) or (Track) Your Desired Campaign Name Kickstarter campaign
EMULATED PHILIPS HUE SEVICE AND CONTROL
Credits for the Emulated Hue to Marius Motea. Follow the guidelines given in the diyHue's Wiki to setup the Emulated Hue Service. Download sketches for your NodeMCU/Wemos/ESP Devices from here After making suitable modifications and uploading the sketches to your device, open the device's webgui by entering the ip address in a browser. In that change the "Startup" value from "Last State" to "Off" as shown below. | Depending upon your device, download the Philips Hue App for either of the platforms from the following links.
To Pair The DiyHue To The App:
To pair a new device to diyHue, first head to http://{IP_ADDRESS}/hue/linkbutton. The default username is Hue and password is Hue. At this point you should open the Hue app on your phone and start searching for hubs. To speed this up you can click the Help button and then enter the IP address of your diyHue device. Once the bridge has been detected, click the green Set up button. At this point, the app will prompt you to press the link button on your Hue bridge. To do so, click the Activate button on the web page you loaded at the start. The Hue app should now prompt you through the rest of the setup. For specific details on how to setup specific lights, browse the lights section in the navigation bar to the right. Command Syntax: To turn lights on/off : "Hey Google, Turn Hue-Light-Name On/Off" To change light colour: "Hey Google, Change Hue-Light-Name colour to Required-Colour" (List of available colours is given at the end of readme doc) To change brightness : "Hey Google, Change Hue-Light-Name brightness to Required-Brightness-Level"
PUSHING MESSAGES/INFO FROM ASSISTANT ON Pi TO ANDROID DEVICE
For pushing messages/info, the GassistPi uses pushbullet python package. To use this feature:
Download and install pushbullet app on your tablet/mobile device.
Visit www.pushbullet.com register for new account or sign in with your existing account.
Choose Settings-->Account and then choose "Create access token".
Copy this token and paste in the actions.py script under the pushmessage function.
GETTING RECIPE DETAILS USING ASSISTANT
GassistPi uses Edamam for getting recipe details/info. To use this feature:
Click here to visit the developers' porta for Edamam.
Signup as a developer/login with your existing account.
In the Menubar at the top, Click on Dashboard-->Applications-->Create a new applicatiuon-->Recipe Search API and then create a new application.
Copy the application id and application key and paste it in the actions.py script under the getrecipe function. **(Note: While copying the application key, do not copy the "—")
Command Syntax: "Hey Google, Get ingredients for Required-Item"
CONTROLLING MAGIC MIRROR BY VOICE
You can control either Magic Mirror running on another Pi or Magic Mirror running on the same pi as GassistPi. As a prerequisite, you should have the remote control module installed in the Pi running Magic Mirror. Enter the Ip address of Pi running Magic Mirror in the config.yaml against the variable "mmmip" declared. Command Syntax: To show/hide weather module : "Hey Google, Show/Hide Weather on Magic Mirror" To turn magic mirror display on/off : "Hey Google, Turn Magic Mirror display on/off" To power off/reboot/restart Magic Mirror: "Hey Google, Power off/Reboot/Restart Magic Mirror"
INDICATORS FOR GOOGLE ASSISTANT'S LISTENING AND SPEAKING EVENTS
Connect LEDs with colours of your choice to GPIO05 for Listening and GPIO06 for Speaking Events.
PUSHBUTTON TO STOP MUSIC/RADIO PLAYBACK AND MUTE MICROPHONE
Connect a pushbutton between GPIO23 and Ground. Single press mutes microphone and double press stops music streaming.
VOICE CONTROL OF GPIOs, SERVO And Pi SHUTDOWN
The default GPIO and shutdown trigger word is trigger. It should be used for controlling the GPIOs, servo and for safe shutdown of Pi. It has been intentionally included to prevent control actions due to false positive commands. If you wish to change the trigger word, you can replace the 'trigger'in the main.py code with your desired trigger word. The default keyword for servo motor is servo. For example, the command trigger servo 90 will rotate the servo by 90 degrees. If you wish to change the keyword, you can replace the 'servo' in the action.py script with your desired keyword for the motor. For safe shutdown of the pi, command is: trigger shutdown